Tags in Shopify help merchants manage many data types. Products, customers, orders, blog posts – tags are useful everywhere in the shop. However, when you create too many of them, you may need to manage Shopify tags themselves. For example, remove excess ones. Today, we will discuss how to delete tags in Shopify in all the fine details. Let's dive in!
The importance of tags for organizing products in a Shopify store
Organizing your data is important for any shop. This is especially true for items in your inventory. Putting tags on them enhances the search process, helping customers find what they seek. For instance, say you sell clothes. Putting the tag "hats" on all caps, fedoras, and other beanies will let them pop up when a visitor searches for, well, "hats". Customers will find them even if there's no word "hat" in it.
If you properly manage tags in Shopify, you can help yourself organize your backend operations. Tags can signify many things. Let's say some products are prone to quick stockouts. You can tag them as "quick stockouts" to ensure they are monitored for restocking. Same with dead-weight items, newcomers, etc.
Simply put, not using tags impairs your item search and behind-the-scenes organization.

Basic methods for removing tags in Shopify
Despite their usefulness, creating too many tags can clutter the backend and make the search confusing. Then the question becomes: "How to delete tags in Shopify"? There are two general methods to delete Shopify tags.
The first method is to remove each Shopify tag by hand. This method is most useful for precise corrections or in smaller stores. It is quick and simple. However, if you need to remove tags from many items, this method will take too much time.
Also, if you want Shopify to delete tags entirely from lists, you have to remove them from all tagged items. Doing this individually for every item will be long and tedious.
Shopify bulk edit tags
The second method is to edit Shopify tags in bulk. It can be done through the entity lists, such as product or customer lists. This method lets you quickly remove tags from many entities at once, skipping all manual work. Its main drawback is that if you need to edit only a handful of entities, it will be simpler to do it individually.
Rating current tags in the store
There are six tag types on the Shopify platform. Some of them can be more useful than others in their design. We rated them based on usefulness, and here are the results:
- Product tags.Undoubtedly, the most helpful kind of tags. With them, searching for products is a much smoother process. Henceforth, more customers will leave with a purchase.
- Blog post tags.As well as the item tags, these help both you and visitors. Users can find content they like more easily and will stay to read it.
- Customer tags.It is always good to know your user base. Propper tagging of registered users helps to create advertisement campaigns and automated mailing. And good advertisement is a cornerstone of commerce.
- Transfer tags.Tracking transferring processes via tags will help with inventory planning. A solid restocking strategy helps avoid stockouts and cuts storage bills. Essentially, it saves you some money.
- Order tags.These tags will help you organize your orders, such as marking the processing steps. Keeping your hand on the pulse of commerce is always helpful to avoid mistakes, mitigate sticky situations, etc.
- Draft order tags.They have the same functionality as the order tags but are reserved for drafts. They can still be useful, but you can easily manage without them.
Explore related reports
Defining tag removal targets
So, let's say you have a little tag problem. You have too many tags on your entities, which clog your view and make navigation difficult. How can you identify which tags are worth removing? Generally, there are three signs that certain tags should be deleted:
- Underuse.If you have 100 items in your inventory and a certain tag is applied only to 2 of them, it is probably useless. Of course, there are exceptions. Some items can be one-of-a-kind, and a tag in question may help users search for them. But generally speaking, each tag should cover more entities.
- Duplication.If you have two tags that are essentially the same – you don't need one of them. For example, there is not enough difference between "finished" and "almost finished" tags for orders. The latter better be deleted.
- Overdivision.You don't need to divide categories too much. The tag "hats" is okay, "caps" is also okay, "red caps" is stretching it, but "red small Nike caps" is definitely unnecessary.
How to delete tags in Shopify
So now, let's go through the step-by-step process of how to delete tags on Shopify.
If you need to delete a tag from one entity, you need to:
- Enter your Shopify admin panel.
- Open the list of needed entities, such as items.
- Click on the item from which you need to remove a tag.
- Locate the "Tags" section on the right.
- Click the "x" on the tag you need to delete. Alternatively, click "manage" above the "Tags" section to see and edit Shopify tag list for this item.
- Save the changes in the entity.

If you want to bulk edit tags in Shopify, you will have to:
- Open the entities with tags you need to edit. For example, orders.
- Pick the entities you need to edit by checking the boxes close to them.
- Click the "Remove tags" button and pick the tags you need to remove.
- Save changes.
Checking tag removal on your Shopify site
Tags are invisible on the website's frontend, so how can you check if you deleted them? For starters, you can just reload the page and reopen the redacted entity via the admin panel. If you were aiming to delete a certain tag entirely, it shouldn't appear in the suggestions for adding a new tag to the entity.
If you removed a certain tag from an item, you can search for the item by the tag. For example, let's say you removed the tag "checkered" from a shirt. If the deletion was successful, when you try to search "checkered" on the frontend, that shirt shouldn't appear.
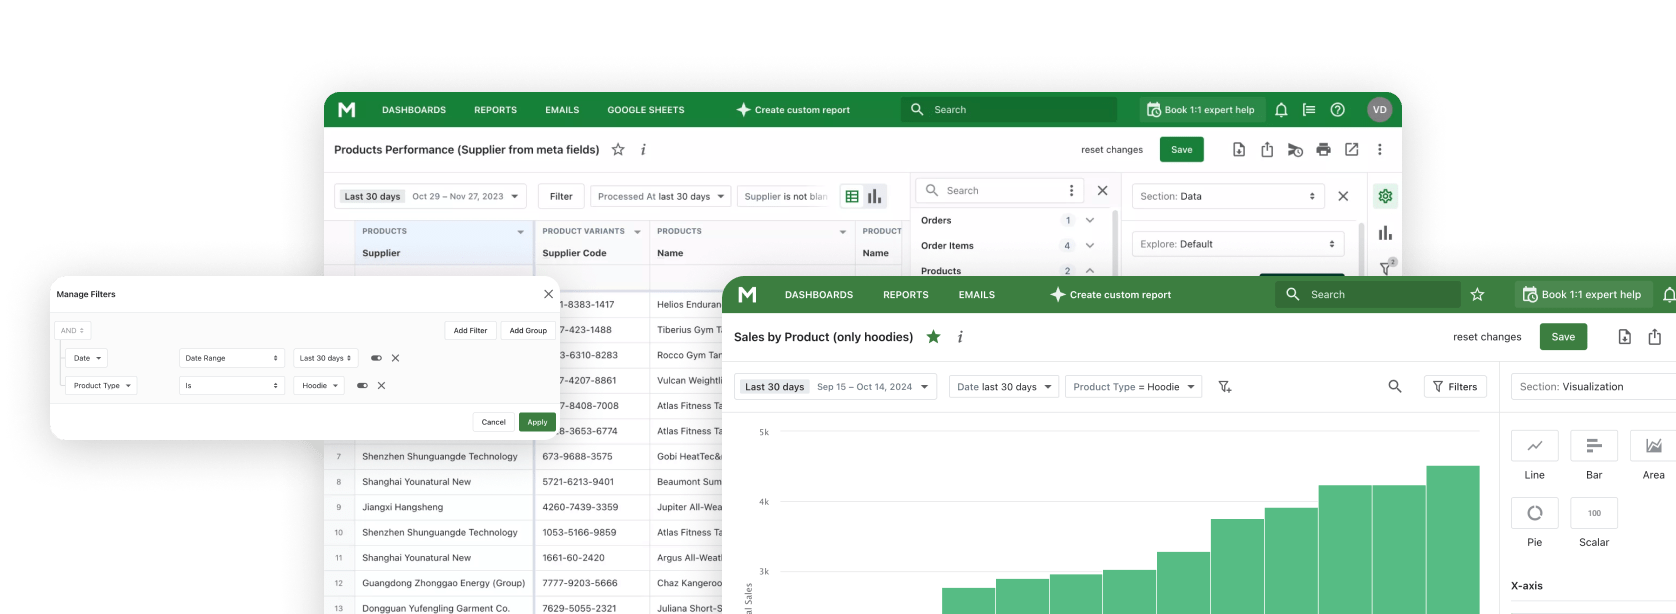
Shopify Sales Report by Product Tag can provide valuable insights into how tags influence sales, helping merchants identify which tags drive customer engagement and improve product discoverability.
Conclusion: Shopify delete tags
Tags can be both useful tools and hindrances. You will clutter your search and backend if you overuse tags and create too many unnecessary labels. This is when it's time to "clear the room" and delete some tags. Luckily, it is a simple process any merchant can do.
Shopify Reports can help analyze the performance of products associated with specific tags, giving you data to determine which tags are worth keeping and which can be removed.
Frequently asked questions about removing tags
Who to remove tags on Shopify?
The right to anything with tags belongs to only the admin of the store. No user can see or influence any tags that are placed upon entities.
How to edit tags on Shopify?
The editing process for tags is very similar to the deletion process:
- Enter your Shopify admin panel.
- Open the list of needed entities.
- Click on the one you want to edit.
- Locate the "Tags" section on the right.
- Here, you can edit Shopify tags: add, change, or delete them.