In the 2010s, there was a big trend of creating business accounts on social media. Back then, it was a novelty for businesses to have their own Instagram or Twitter. Today, it's not a trend but a new norm expected from any company. One of the most prominent social networks in this regard is Facebook. So today, we will discuss how to add a Facebook meta tag to Shopify and verify your domain. Let’s dive in!
What is Shopify domain verification?
So, let’s say you want to create a business account on Facebook. You can easily create the page, fill it with information, add contacts, etc. There is no such necessary step as Facebook domain verification with a Shopify meta tag. So what is it?
You can ask Facebook to recognize your Shopify store and verify domain ownership. The verification can be done in multiple ways. This will bind your shop’s domain to your Facebook pages in the system. You will gain control over link usage, editing rights to your ads, access to analytics, and Facebook shops.
For example, you can give certain Facebook pages permission to change your ads and use your links. These pages must be linked to your Facebook Business Manager. This way, only trusted pages can use your data, protecting it from misuse by scammers. You can also set up a seamless integration between the Shopify store and the Facebook shop.
Explore related reports
Why do you need to verify the domain for Shopify?
Okay, now you know what this domain verification is. But what benefits does something like meta tag Facebook domain verification for Shopify bring? Do you even need it to run a successful social media page? Let’s tackle each question separately.
Who needs to verify Shopify domain on Facebook?
Some store owners can easily use a Facebook business page without domain verification. Small shops often don’t bother with verification. If the page is only used for advertising, you can also go without it.
However, any Shopify merchant should verify their domain. The reason is simple: it doesn’t apply any restrictions and only provides benefits. Even if you are not scared of fraud or don’t need precise control over your ads – there is no good reason not to do it.
What are the benefits?
When you connect and verify your domain, you get these advantages:
- Protection.As stated earlier, no one else can use your domain after you verify it. Scammers will have a harder time pretending to run your store if there is already a verified page. Also, no one but you will be able to change your ads.
- Control.After the verification, you gain control over link descriptions in your shop's ads. This is a way to micromanage them and tailor them to your preferences.
- Analytics.Verification provides you with access to Facebook ads analytics. You can see what ads users click, what behavior they show, and your demographic. This data can help you change strategies to run your business better.
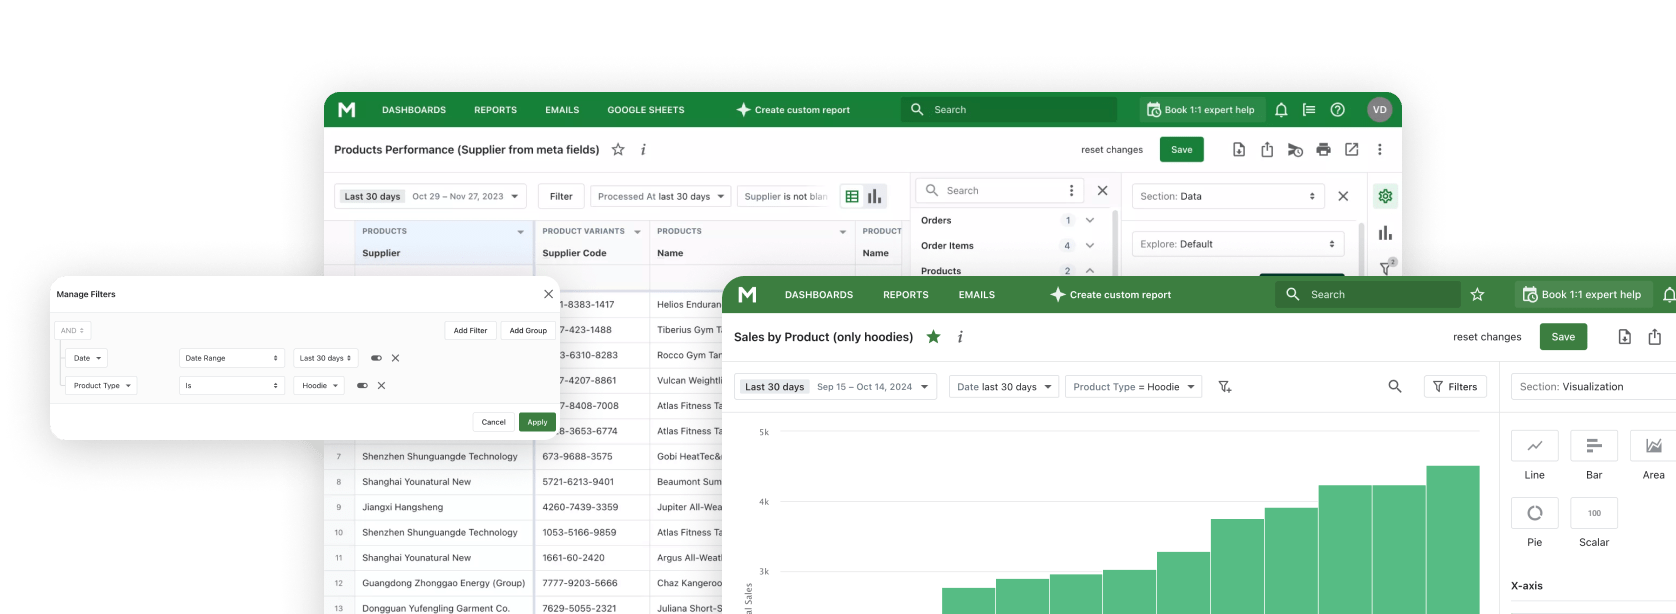
- Expansion.Verified pages can connect Facebook shops with Shopify. Visitors to your Facebook page can see your wares, place orders, and transition to your website. Shopify Custom Reports provide detailed insights into sales trends, customer behavior, and product performance, helping you make informed decisions.
- Trust.A page with a “Verified” badge instantly sparks trust inside the average Facebook user. Trusted shops receive more buyers, so it’s an easy way to boost revenue passively.
How to verify Shopify domain with Facebook?
Facebook domain verification is simple. First, you need to enter your domain. To do this, log into your Facebook business account and enter Facebook Business Manager. Then, navigate through Business Settings – Brand Safety. Pick Domains, push the “Add” button, and then the “Create a New Domain” button.
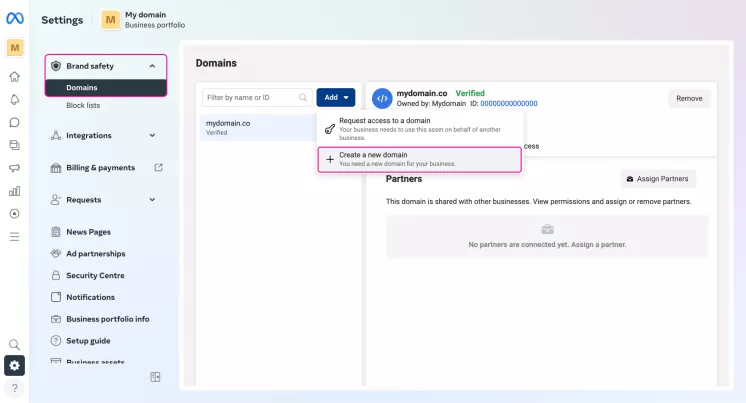
Enter your core domain and click “Add”. You will then be presented with two options for verifying your domain. Let’s review them.
Meta tag verification in Shopify
Adding a Facebook meta tag to the Shopify store is one of the easiest ways to verify a domain. Here is how to add the meta tag to Shopify:
- Copy piece of code suggested by Facebook. This is the needed meta tag.
- Log into your Shopify admin panel.
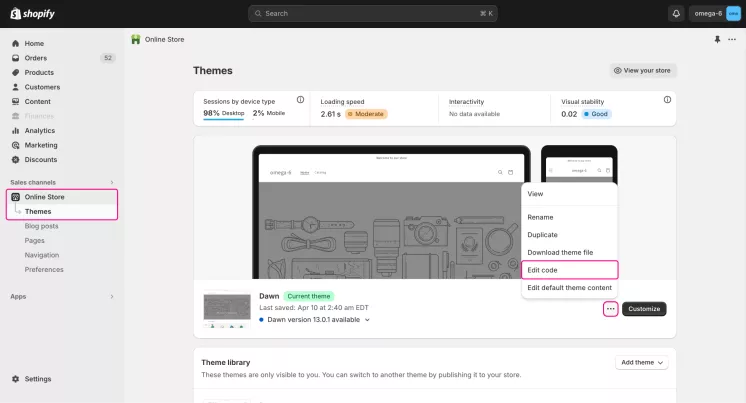
- Navigate to the Online Store – Themes.
- Click the “Edit code” option on the current theme. You can find this option by clicking three dots close to your theme.
- Open the “theme.liquid” file.
- Locate the “Head” tag, create a space with Enter, and paste your Facebook meta tag.
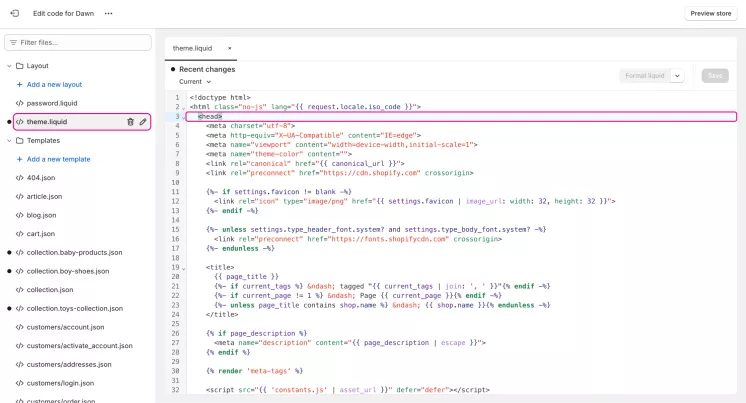
When you click “Verify domain”, Facebook will crawl your website and search for the tag. When it finds it, your domain will be verified.
DNS verification in Shopify
Shopify DNS verification requires entering a certain record into your domain’s DNS settings. This option is accessible only if you bought a Shopify-managed domain. Facebook will provide you with the record. To add it, you need to:
- Log into your Shopify admin panel.
- Go to the Settings – Domains.
- Click “Manage” on the purchased domain.
- Navigate to the Domain settings – Edit DNS settings.
- Click the “Add custom record” button, choose a type, and enter the required record.
After the process, Facebook will scan your DNS records. If it finds the correct record – your domain will be verified.
HTML file verification in Shopify
An HTML verification file can be added to other websites but not with Shopify. Shopify doesn’t give users access to the website's root directory. Henceforth, you cannot add any file to it to verify your website. In this case, you must stick to the other methods.
Summary
Shopify domain verification by meta tag or DNS is quite a useful feature. It gives you access to things like Facebook shop integration and analytics while protecting your shop from fraud. Any shop will be better off with domain verification.
The process itself is pretty simple. If you have a regular domain, you just have to paste a code string into your theme file. That’s how you add a Facebook meta tag to Shopify. And if you bought a Shopify-managed domain, you must enter a record into your DNS settings. It sounds frightening, but it goes quite easily.
